Audits and Sign-Offs
How to navigate the system to carry out and record audits for your SCR.
-
Getting Started Day To Day Management Managing Users Managing Multiple Schools The Dashboard The Template Editor Managing Staff Profiles Advanced Editor Insights and Reporting User Settings MIS Integration Troubleshooting and Support Safeguarding Guide What's New External Checks Sign In App Integration Incident Tracking
Table of Contents
This guide will cover:
How to Carry out an Audit: Via individual profile pages or in bulk.
Sign Off's: How to record and track a sign-off, as well as amend user permissions.
Spot Check Audits: How to create a custom section to record spot-check audits on profiles, and how to track these.
The Audit Log: How to view all changes made across your system.
How to Carry out an Audit
There are various ways you can carry out an audit on the system, depending on the type of audit and what overview you need.
Auditing Individual Profiles
To audit an individual profile, you can do this via the Profile Page. Please see our collection of help articles below on searching profiles and navigating the profile page:
Auditing Profiles in Bulk
To audit profiles in bulk, you can either use our Advanced Editor tool or the default Single Central Record report which can be found under Insights:
The Advanced Editor - Help collection
The Advanced Editor is recommended if you want to add any individual audit notes to profiles, as you can update profiles directly within this tool.
Sign-Offs: How to Record and Track
Once you have carried out an audit, you can record this using our built-in 'Sign-Offs' feature.
Recording a Sign-Off
To sign off your Single Central Record, click the + symbol in the top right-hand corner of your dashboard, then select 'Sign Off'

You will then be presented with the following view, where you can add any notes relating to the sign-off, as well as add any documents if needed, then save by clicking the blue 'Sign Off' button:

Tracking your Sign-Offs
You can track these either by adding the 'Sign Offs' widget to your dashboard:

Alternatively, you can view and export all Signs Offs made using the Sign Offs Report in the Insights Tab.

The Sign Offs Report will show you a chronological list of all Sign Offs completed, along with the User that completed it, any Notes or Documents, and what the Ratings were at the time of the Sign Off.
Sign Off Permissions
If the current User is already set to be an 'Administrator' - this will automatically include the 'Sign Off' permission.
If the current User is not an 'Administrator' then you will need to add this Permission to their account. To do so go to Settings > Users. Next, double-click on the User's name from your Organisation's User List.
From the Edit User area, toggle on the 'Sign Off the SCR' permission toggle:
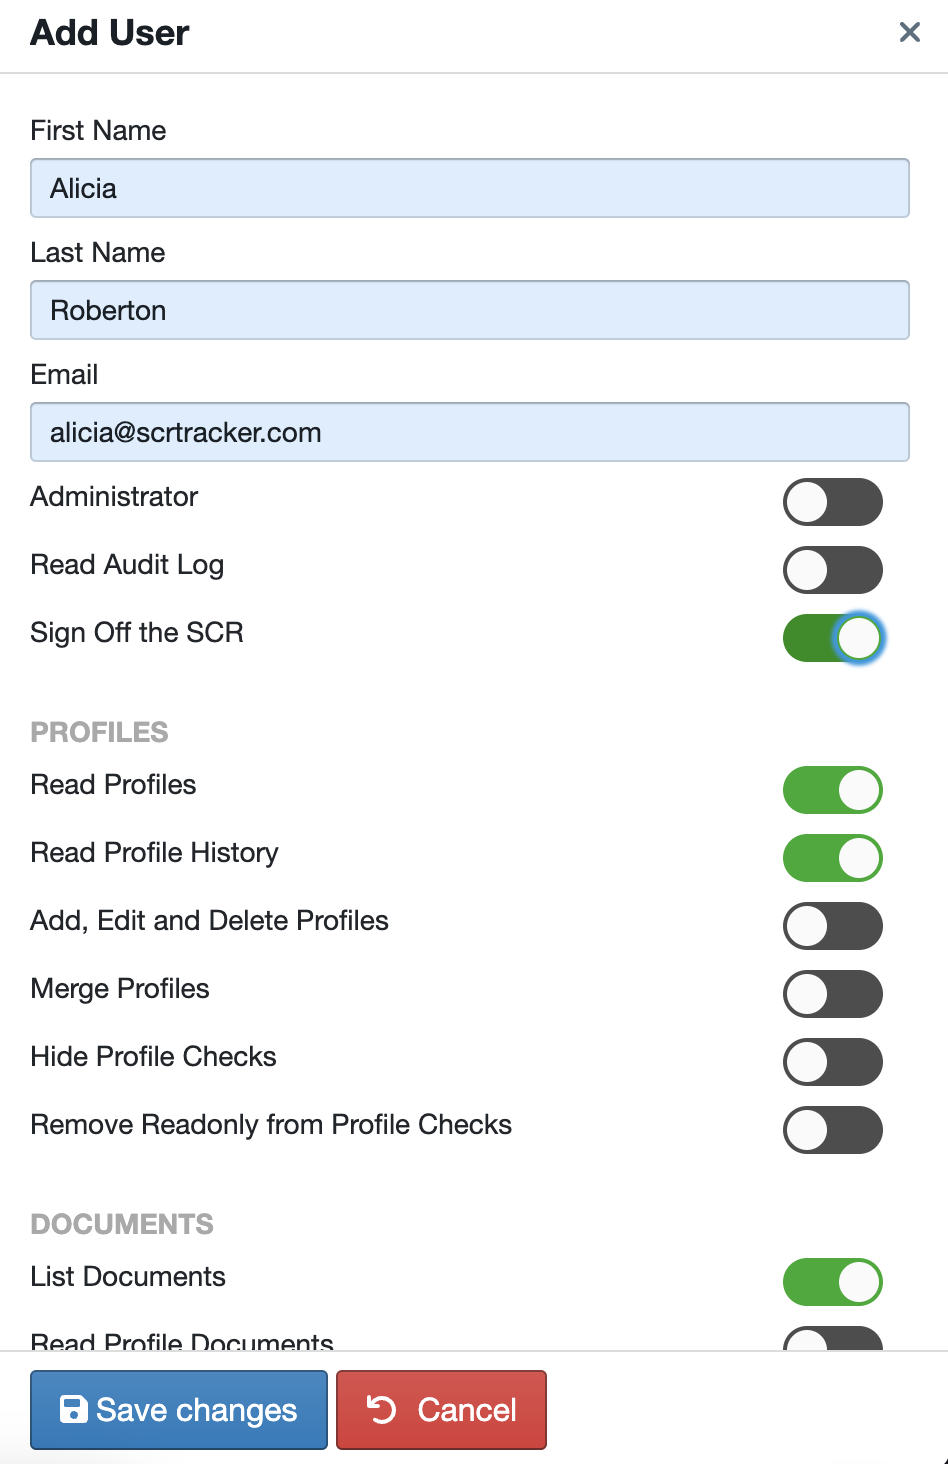
Click 'Save Changes' to finish.
When adding a new User (who is not an Administrator), simply select the "Sign Off the SCR" permission from the list.
Please Note: A User will need at least Read-Only Permissions set in order to have access and use the Sign-Off feature.
Spot Check Audits
You can also create a custom section to record spot check audits if you would find this useful. This can then be tracked via custom widgets/reports.
Creating a Custom Section
To add a custom section, you will first need to open the template you wish to edit.
If you are a single school, from your Sign In Central Record Dashboard, click on Settings>Organisation>Templates>Edit.
If you are a Trust-level user, and you wish to add these sections and fields across all of your schools, you will need to access the Template Editor via Settings>Federation>Templates>Edit.
Please Note: If the Templates option is greyed out, it is because you do not currently have permission to edit the Template. In this instance, please contact your school or trust administrator.
Once you have opened the Template Editor, you can then Add a Section. Please see an example of a custom section for this below:
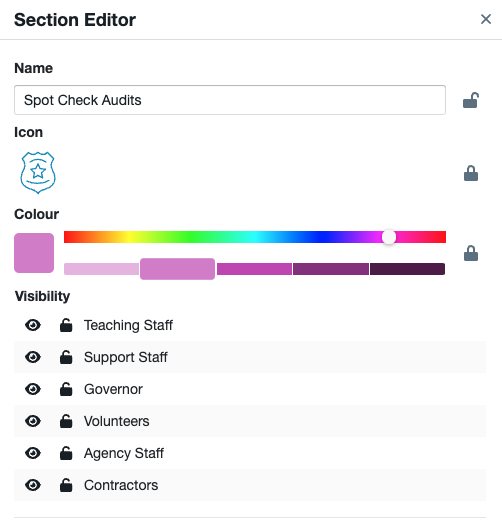
Now you have created your custom section, you can start to build this using the field library over on the right-hand side. Please see our guides for Adding a Field and Editing a Field to assist with this.
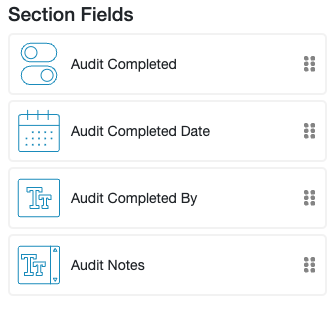
Below is an example of fields that could be added to your Spot Check Audits section. We recommend leaving these fields un-rated unless you would like them to be flagged up as missing information until an audit has been carried out on each individual profile:
Tracking Spot Check Audits
You can track your spot check audits either via a custom widget (or widgets) or through custom reports. Please see our guidance for this and some examples below.
Reports
To create and customise a report, please see the following:
Create a Custom Report
Customise your new Custom Report
As an example, if I wanted a report to show me all profiles where a spot check audit has been completed, I would de-select the fields I didn't need in the report and set a condition for the report to show me only those profiles where the 'Audit Completed' toggle field, is selected:
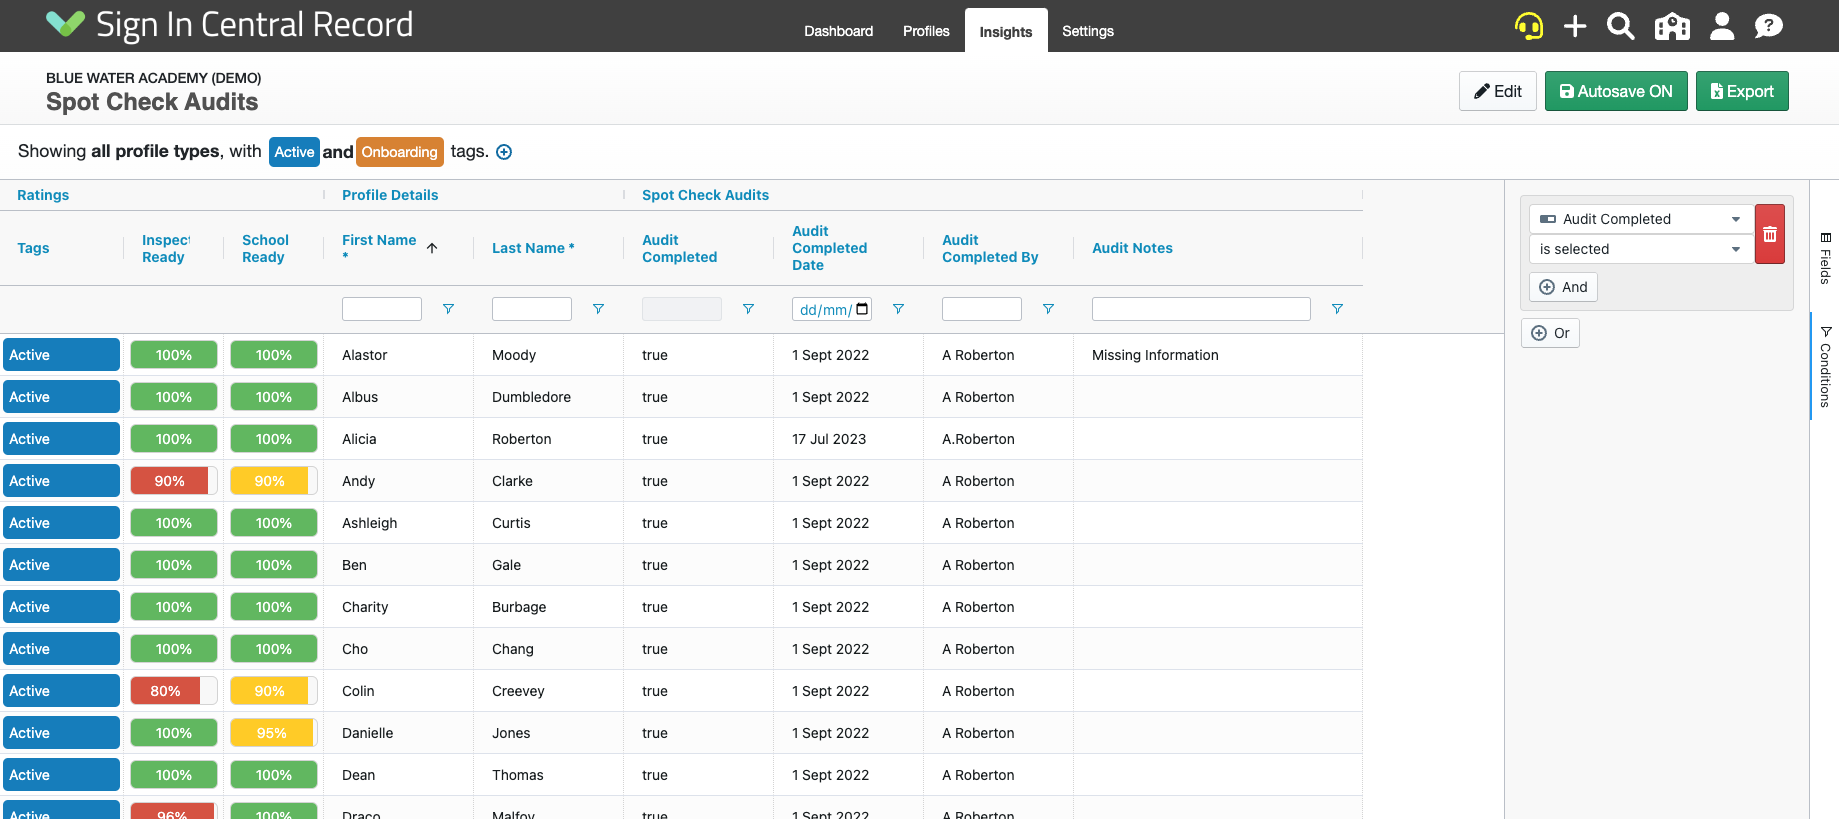
The report would then remain a live, up-to-date list of all profiles that fall within these conditions
Widgets
To create a custom widget, first go to the dashboard you wish to add this to. You can create a custom dashboard for audit tracking if you'd like to keep this separate from your default Dashboard.
Once you are on the dashboard you wish to edit, click '+ Add Widget' in the top right-hand corner and select the 'Profile List' widget.
To start with this will show all Active and Onboarding profiles, but can be customised via the cogwheel icon in the top right-hand corner of the widget: 
Here, you can rename the widget and customise what you'd like it to show. For example, if I wanted a widget to show me all staff that had not yet had a spot check audit, I would amend the settings and add a filter logic as below:
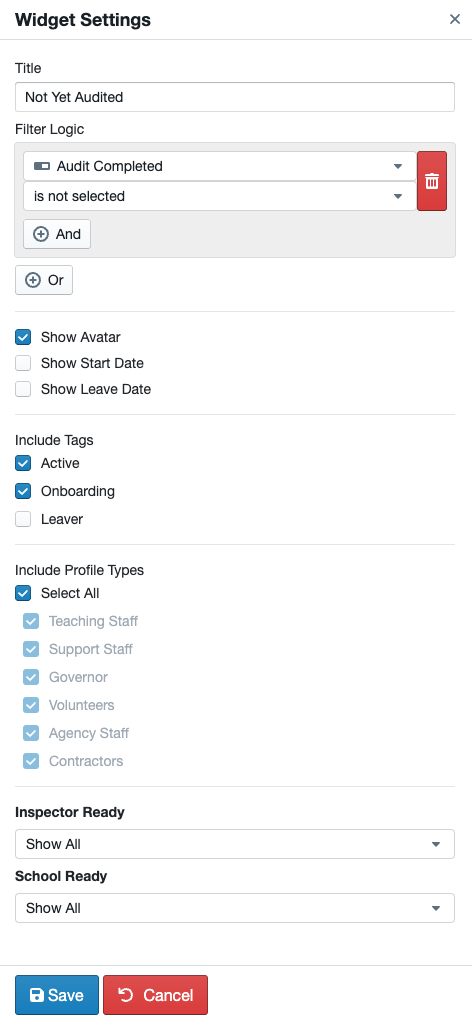
The widget would then remain a live, up-to-date list of all profiles that fall within these conditions. For further information on how to customise your dashboard(s) and widgets, please see below:
Visibility and Filter Logic Editing
The Audit Log
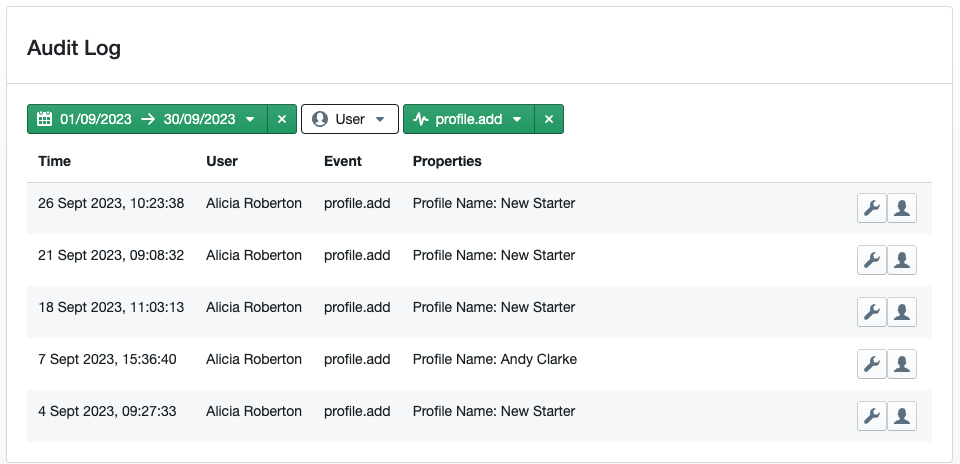
Within Settings>Organisation>Audit Log we have created a full system Audit Log which records every action taken across the whole system.
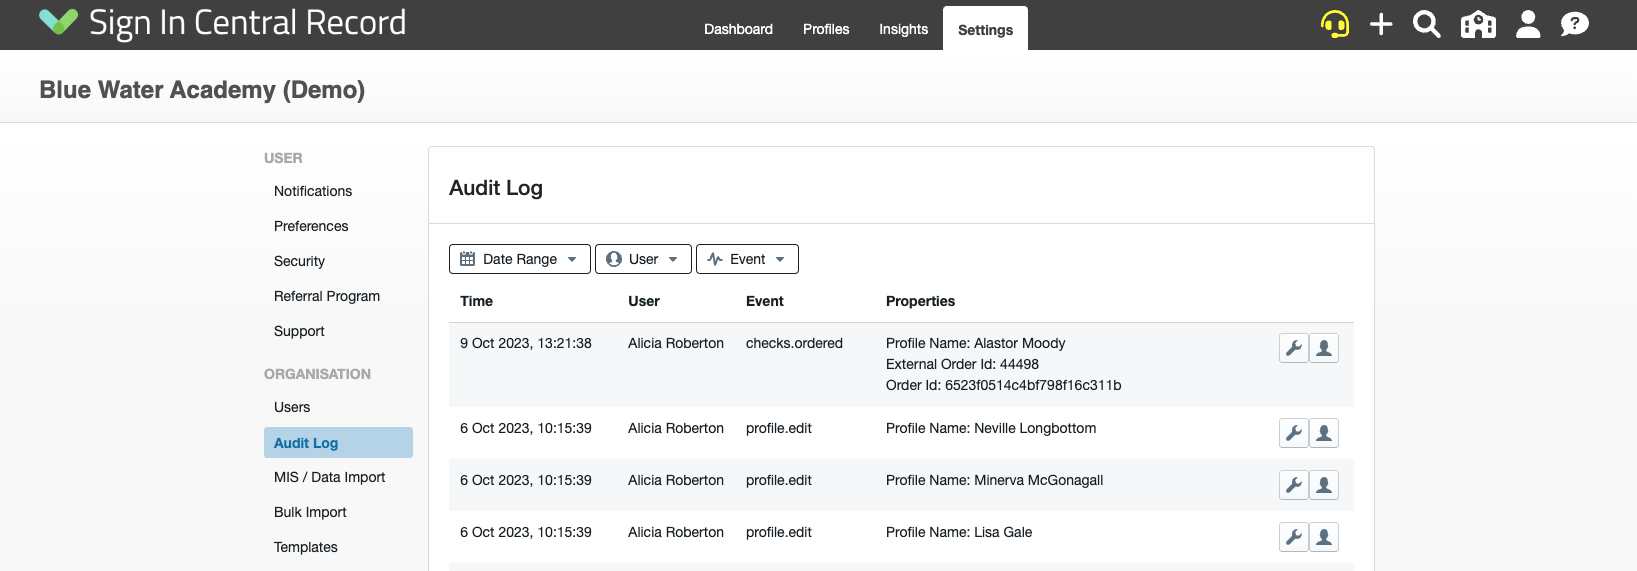
You can filter by Date Range, User, or Event if you are looking for something in particular. As an example, if you wanted to see all profiles that had been added for the month of September, the filtering would look like this:
