Template Locking
A guide to Template Locking
-
Getting Started Day To Day Management Managing Users Managing Multiple Schools The Dashboard The Template Editor Managing Staff Profiles Advanced Editor Insights and Reporting User Settings MIS Integration Troubleshooting and Support Safeguarding Guide What's New External Checks Sign In App Integration Incident Tracking
Table of Contents
Please ensure you have read our Template Overview to get an understanding of how the Template hierarchy works.
Locking
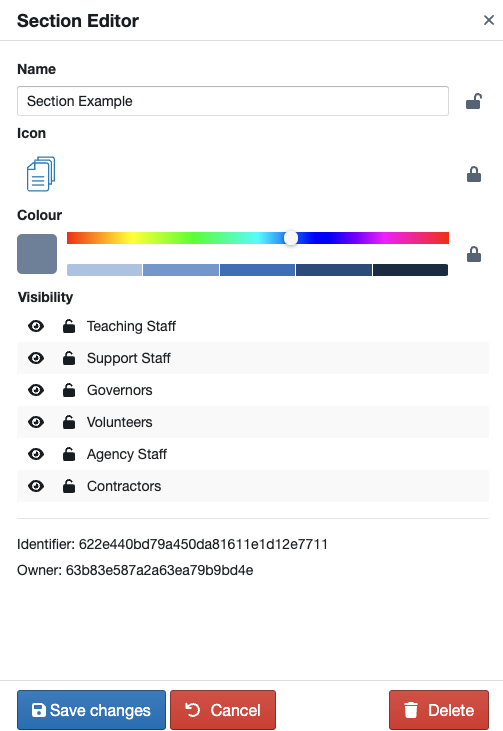
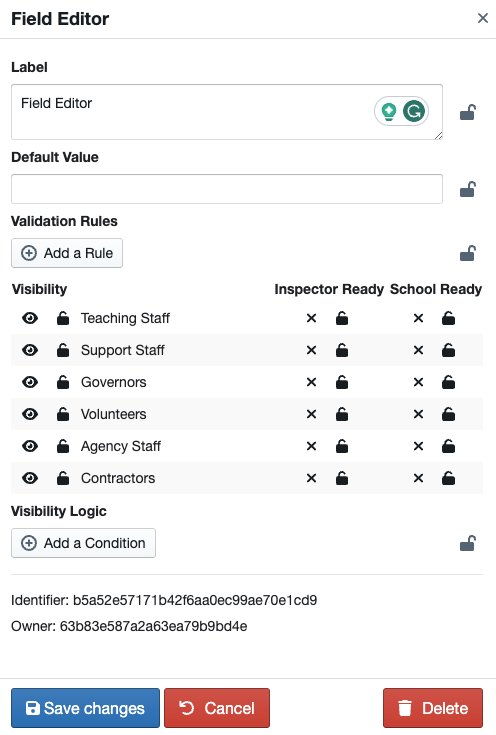
When editing a Template, the Lock icon appears in several places on the Template Editor. Notable examples are our Section and Field Editors:


The Lock has 2 states, Locked and Unlocked.
Locked
![]()
When it is Locked, this means that no Templates underneath this one can override this value. Even if it has been changed already.
For example, if you are editing a Federation template, and lock the Name on a Section, this means that Organisations will not be able to modify the Name property on this section and it will appear as read-only in their Template Editors.
Note, if the child template has already made a change to the Name, and you enable the lock, their change will no longer be honoured.
Unlocked
![]()
When it is Unlocked, this means that there are no editing restrictions in place.
This is the mechanism we use in our Application and Guidance Templates to ensure that mandatory fields cannot be disabled or renamed.
We do provide some default fields in our Templates such as Middle Name or Address Fields which can now be turned off and replaced with your own.
If you were part of a Federation and decided you must record the Middle Name in all organisations, the Visibility can be turned on and Locked, then any Organisation Templates will be forced to adopt this field.
The other important aspect is that Profiles can also Hide non-mandatory checks using the Hide Checks functionality. If you want to prevent this, you need to Lock the Visibility on the relevant fields.
