Existing Sign In App Customer, New to Sign In Central Record
How to integrate Sign In App as a new customer of Sign In Central Record.
- Sample Public: Our Values
- Getting Started
- Day To Day Management
- Managing Users
- Managing Multiple Schools
- The Dashboard
- The Template Editor
- Managing Staff Profiles
- Advanced Editor
- Insights and Reporting
- User Settings
- MIS Integration
- Troubleshooting and Support
- Safeguarding Guide
- What's New
- External Checks
- Sign In App Integration
- Incident Tracking
Table of Contents
Welcome to Sign In Central Record! 🙂
You should have received a welcome email from us, which will contain a link to your Onboarding Training course. Ahead of this, please follow the below steps to complete your integration with SIA.
Step 1: Link Groups to an Organisation
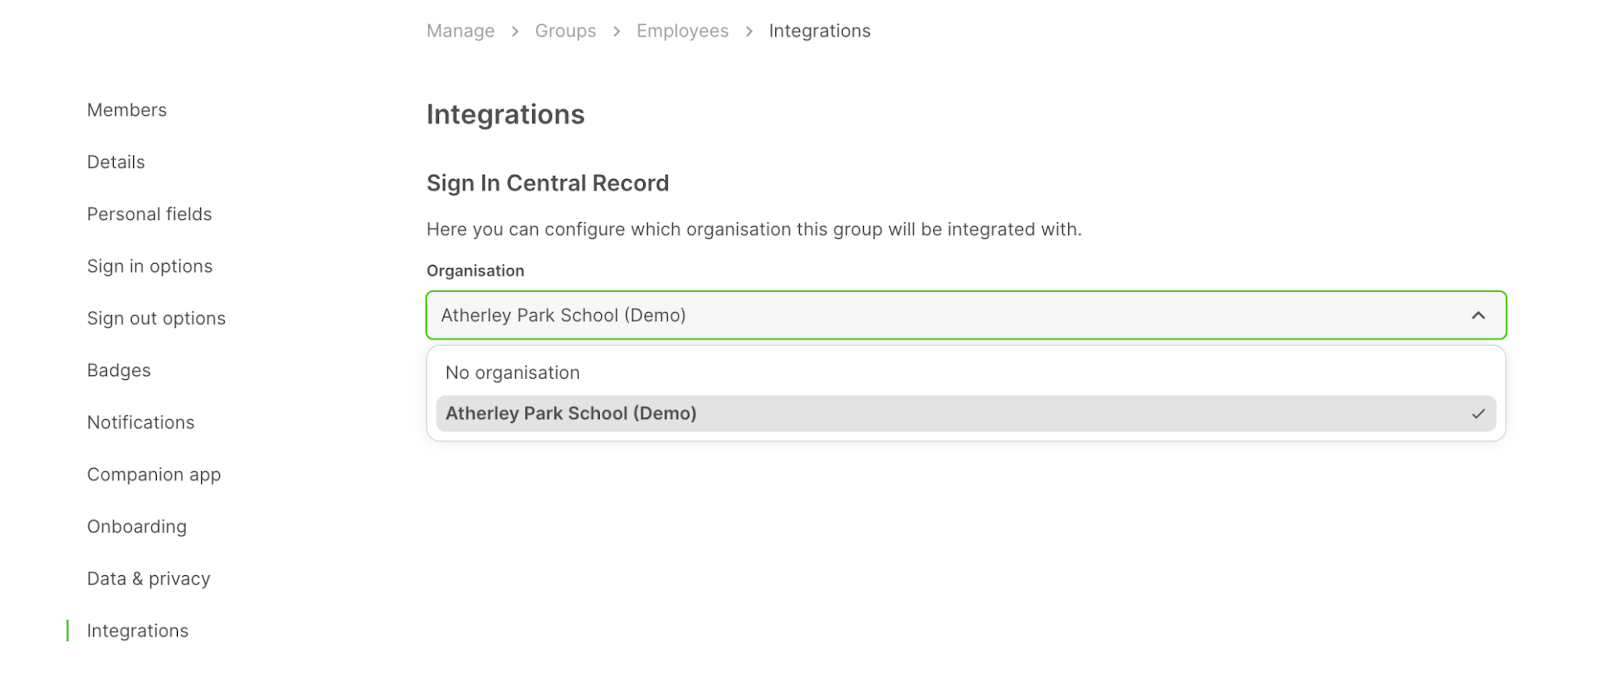
From your Sign In App account head to Manage > Groups > Select Staff group > Integrations and from the dropdown select your organisation. You can link any repeat visitor group with your SICR account from here. If you’re a school trust you may see multiple organisations here, select the one relevant to the group in Sign In App.

Step 2: Enable profile type mapping
Your Staff in Sign In App will automatically pull across to your Teaching Staff in SICR, but for other profile types, we need to map a Profile type in SICR to a group in SIA.
To do this, head to SICR and then go to Settings > ADD-ONS > Sign In App > Profile Type Map. In this example we’ll set up the Contractors profile type, to do this click the Edit button next to the Contractors profile type.

This will pop up a panel on the right side of the screen, we want to select Sign In App - Group ID from the first dropdown and then set the second to is equal to and finally select the group in Sign In App you’d like to map across to, in this case Contractors. This will then map across all members of the Contractors group in Sign In App to the Contractors profile type in SICR.

Please Note: If you don’t see the group you’re looking for under Sign In App - Group ID it’s likely that you haven’t set up the integration in SIA for that group. From SIA head to Manage > Groups > Select group > Integrations and select your organisation. Then go back to SICR and refresh the page, you should now see the group you’re looking for.
Step 3: Complete your Onboarding Training with SICR
This training covers how to customise your Template, import your current SCR data, and also includes some day-to-day management to help you find your way around the system.
Step 4: Sync Across profiles
If you would like to integrate using Wonde, firstly please ensure all additional permissions have been approved in the Wonde portal. Next, from your SICR portal, go to Settings > Sign In App > Configuration > Field Mapping and set up the fields you’d like to map across.
Using the 2-way sync, from your SICR portal go to Settings > ADD-ONS > Sign In App and click the Import button. This will pull through the profiles from SIA based on the new Profile type mapping and will create the new profiles as duplicates in SICR.
Step 5: Enter your remaining SCR information via one of the two below methods
Method 1: The Bulk Importer
This is a copy-and-paste exercise into our Bulk Importer tool, which will create profiles for you. You would then need to merge these profiles in bulk with your duplicate SIA profiles that have been imported. Please see below guides for this:
Method 2: The Advanced Editor
This is also a copy-and-paste exercise, using our Advanced Editor tool to update your existing SIA profiles that will have been pulled through from the integration. You will firstly need to make sure that your profiles have mapped through to the correct profile type. If you need to change any, you can do so in bulk using the below guide:
Change a Profile Type (Individually or In Bulk)
Once you have checked/updated this, you can use the Advanced Editor to enter your remaining SCR data. Please see the below guides for various tips and tricks on narrowing down your view to make the process nice and straightforward:
The Advanced Editor - Video Guide
Using The Advanced Editor
Tip: Please ensure that your profiles are in matching alphabetical order in both the Advanced Editor and your Excel sheet before starting to copy and paste the data across.